Welcome to OnSpend!
Whether you are just getting started with the cloud, or you have fully adopted cloud and have migrated your IT infrastructure to the cloud, OnSpend makes it quick and easy to understand your cloud usage and related costs.
Getting started with OnSpend is quick and easy, especially if you have chosen Onix as your premier cloud partner. This guide will go over the basics of getting setup and started with OnSpend as well as some essential tips for getting the most insights out of your cloud environment.
Signing In and Accessing OnSpend
In order to access OnSpend, you must be invited by either an Onix representative or by your organization's cloud billing administrator. Once you receive the invitation to join OnSpend, you will be prompted to sign-in with either an email and password or with a valid Google account by clicking Sign in with Google. Regardless of whether you sign-in with email and password, or with Google, you must use the same email address in which the invitation was delivered.
OnSpend comes with many features that can integrate directly to your Google Cloud or G Suite account. As a result, it is recommended to sign in with your Google account in order to take advantage of these features. Google sign-in also automatically verifies your account and allows for the easiest and quickest sign-in experience.
If you prefer to sign-in with an email and password, click Create An Account. You will be asked to provide your name, email address, and password. Before you can login for the first time, you will be sent an email to verify your account at the email address you used during account creation. If you do not receive an email within a few minutes, make sure to check your spam folder before contacting support. Once you verify your email address, you will be able to sign-in with the email and password you provided. You can reset or change your password at any time by clicking Trouble logging in? on the login page.

Getting Started - Onix Customer
As your premier Google Cloud or Google Maps partner, Onix provides you with world-class cloud billing services provided by our team of cloud professionals. Invoices and charges for your usage of the Google Cloud Platform products and the Google Maps APIs are provided directly from Onix.
As a result, there is no additional setup or configuration required to view your cloud usage and costs through OnSpend.
Note: The OnSpend dashboard will only display data once projects are linked to your billing account and usage is incurred by any of the Google Cloud Platform or Google Maps services. It may take up to a few hours after usage is incurred before data will be available in OnSpend. If you need assistance with linking a project with your billing account, please contact onspend@onixnet.com.
Getting Started - Google Customer
You can manage your cloud billing accounts and projects through OnSpend even if you bill directly through Google. In order to use OnSpend with your Google managed billing accounts, you must complete account setup before you can start using OnSpend.
In order to complete setup, you must meet the following requirements:
- You must have an open and active Google Cloud billing account.
- You must be a Billing Account Administrator.
- You must be a Project Owner of at least one project linked to the selected billing account.
- Go to the OnSpend Groups page and sign in or, if you don't already have an account, sign up.
- Click the New + button at the top of the page.
- Click Add New Account.
- Select Google Cloud. Note: OnSpend currently only supports Google Cloud billing accounts and projects. AWS accounts are currently not supported, but will be coming soon in a future release.
- You will be prompted to grant OnSpend access to your Google Account. Click Allow to grant access and continue with setup. Failure to grant OnSpend access to your account will prevent you from continuing to use OnSpend with your own billing accounts. To learn more about how OnSpend handles data and how we use access to your account, please refer to Google Authorization for OnSpend.
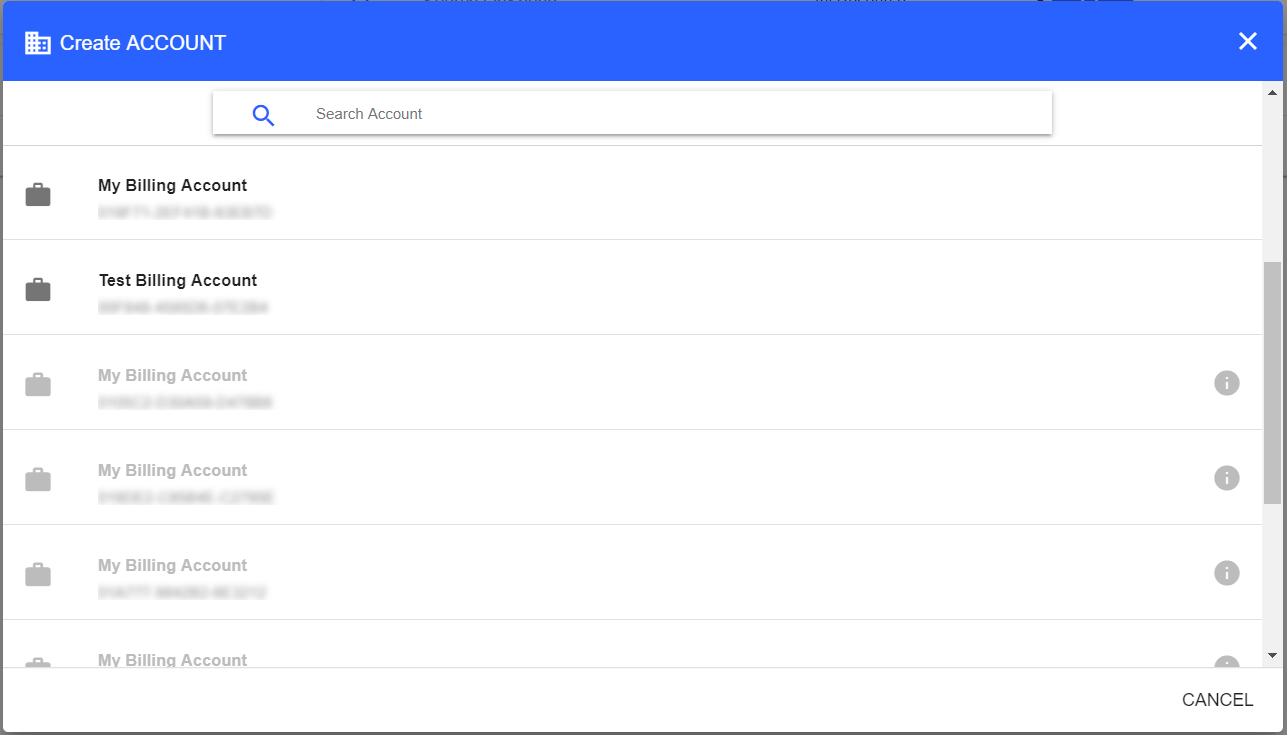
- Once you've granted access to OnSpend, select a billing account. If your billing account is absent from the list or it is disabled, the account has either been closed or you do not have the proper billing account access.

- If billing exports to BigQuery are not enabled or if OnSpend is unable to detect the location of your Google Cloud billing information, you will be required to grant additional access to OnSpend before continuing. Click Authorize and Allow.
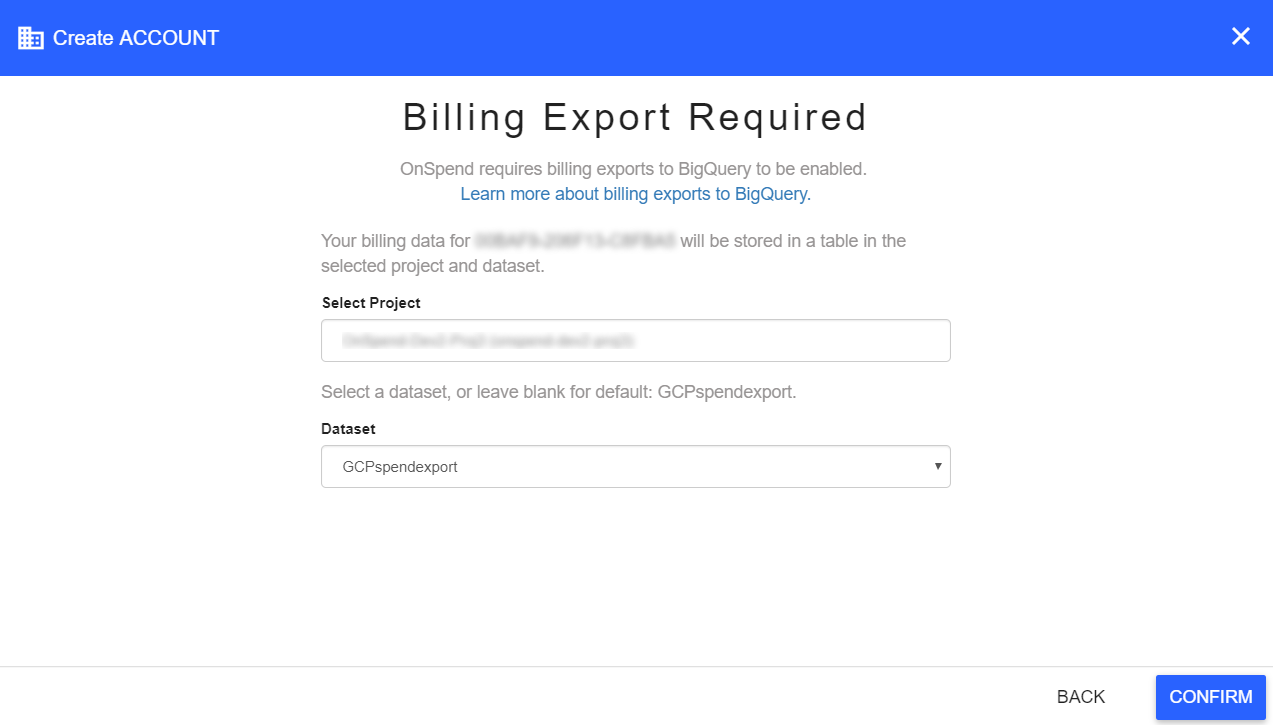
- OnSpend requires billing exports to BigQuery to be enabled. To learn more about billing exports to BigQuery, please refer to the Export Billing Data to BigQuery documentation. Select a project from the list of projects linked to the selected billing account. Next, select a dataset from the selected project to tell OnSpend where the billing data will reside. You may leave this field blank to have the default GCPspendexport dataset selected. Note: You must be an owner of the selected project.

- Click Confirm.
- You will be asked to open the Google Cloud Console to enable or confirm the billing account data export settings. Please make sure the setting in the Google Cloud Console matches the selected project and dataset from the previous step. If the settings in the Google Cloud Console are different than the settings selected in the previous step, click the Back button and select the project and dataset as shown in the Google Cloud Console. Once the settings in OnSpend match those in the Google Cloud Console, click Confirm.
- OnSpend will attempt to connect to the billing export table. Click Save to complete account setup.
